How to Color a Cake Without Food Coloring
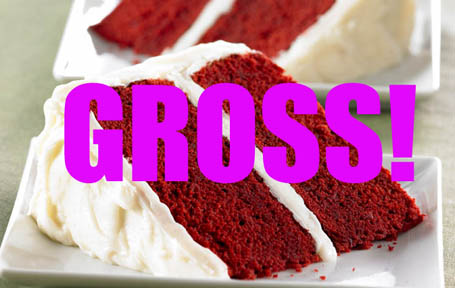
Who thought this was a good idea?!?
I'm gonna shoot straight with you. Red Velvet Cake grosses me out. I look at it, and I feel compelled to run to the nearest toilet. It's not because I've had a bad experience with it. To be perfectly honest…I've never tasted it. (Well, except for the one my friend Chris made with beet juice. It was yummy. But it tasted like beets.) You just can't convince me that there's any reason to pour a gallon of food coloring into a cake for no other purpose than to make it red. That's gross. Who thought of that?
I'll tell you who.
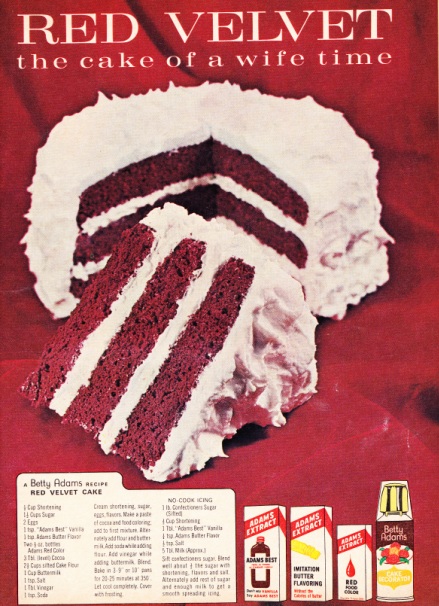
"The cake of a wife time."
In the early 1940's, the Adams Extract company (right here in Texas!) was suffering, like most businesses during the Great Depression, and they needed a ploy to sell more food coloring. Mr. Adams and his wife Betty were lunching at the Waldorf Astoria in New York (obviously they weren't hurting TOO bad), which had been serving a "Red Velvet Cake" colored with beet juice on their menu since the 1930s. Adams realized that his red food coloring could really be used to amp up the color of such a cake, and it would no longer taste like beets. So his company released an "original" recipe for Red Velvet Cake…a chocolate cake dyed red with their food coloring, topped with a boiled milk-and-flour frosting called Ermine Frosting or "Betty White Original Icing." (They later replaced it with a no-cook frosting.) They even invented a catchy tag line for the cake. "The Cake of a Wife Time." (whatever that means!) You can read their original recipe here.
This wasn't, however, an original recipe. The only thing that made it original was the addition of red food coloring. Because before that…in fact, LONG before the Waldorf began making Red Velvet Cake…"velvet cakes" were commonplace. A simple cake with a luxurious texture thanks to the reaction of acidic buttermilk with alkaline baking soda. There were many versions of velvet cake, and they appear in recipe books dating back to the early 1800s. There was pineapple velvet cake. Lemon velvet cake. Red velvet cake, which simply referred to a vanilla velvet cake made with "red sugar"…which is what brown sugar was called back then. And "mahogany velvet cake," which was a chocolate version of the cake that happened to turn a reddish color when the cocoa powder met the buttermilk.
You see, chocolate, like many natural plants, contains compounds called "anthocyanins" which are red in color, and are responsible for the hues in everything from raspberries to rhubarb to roses. Anthocyanins are bright red in their natural acidic environments…but when they meet an alkaline environment, they turn brown. Chocolate manufacturers in the Netherlands discovered this little fact in the early 1800s, and started alkalizing ALL their chocolate and cocoa powder, to make it a deeper, richer color, and thus commanding a higher price. This became the predominant way to make cocoa powder, and by the 1930s when the Waldorf was making Red Velvet Cake, that natural chemical reaction that rendered the batter a reddish tinge wasn't happening any more, so they had to add beet juice to make it red.
And the old fashioned red velvet cake, colored naturally, was lost to the history books.
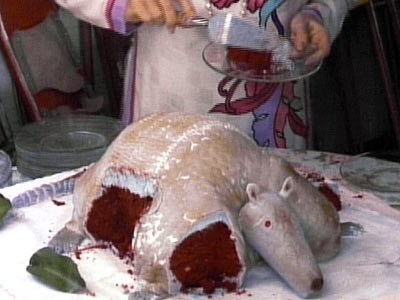
The cake that started America's love affair with Red Velvet.
Red Velvet Cake, despite all the free recipe cards on food coloring boxes and the catchy "Cake of a Wife Time" slogan, never was very popular in the US. Then a little film called Steel Magnolias was released in 1989, featuring an armadillo-shaped Red Velvet Cake with grey frosting, and the cake took off. Now it was at every Southern bride's wedding reception, and a famed bakery in New York (coincidentally called Magnolia Bakery) began selling a legendary version of it. And no one ever looked back.
Except that I could never bring myself to choke down a piece of the unnaturally red cake. Because of that dark alkaline cocoa, recipe developers had to back off the amount of cocoa so that the red food coloring could shine through, and the cake actually had no flavor other than "red." Famous cookbook author James Beard was a noteworthy critic of the cake, saying it was bland and uninteresting. And, having baked a version of the Adams original recipe (sans food coloring and artificial butter flavoring), I found it tasted more like banana bread than chocolate cake, but with a rich, velvety texture. It was a starting point. And now there are sources for non-alkalized cocoa powder…so surely…SURELY I could resurrect that old-fashioned cake that turned red naturally when cocoa powder met buttermilk.
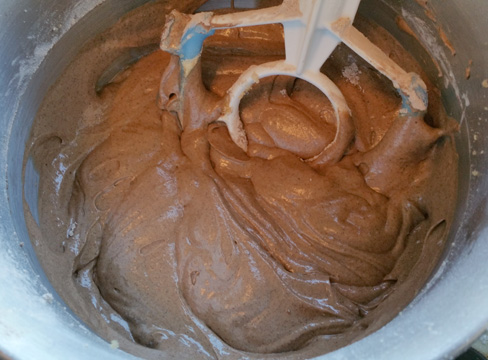
Real Red Velvet Cake batter with no food coloring. After baking, this batter turns a reddish tinge, but not other-worldly and fake. This is how Red Velvet Cake used to be made!
I reverse engineered the Adams recipe, removing the food coloring, and adding more naturally-processed cocoa powder, a bit at a time, until I reached that magical point where the batter had a reddish tinge. But after baking it, I had lost that velvet texture…the air holes (or "crumb") in the cake were much larger and more coarse, due to the fact that natural cocoa is acidic, and more acid reacting with the baking soda meant more carbon dioxide being released. So I began backing off of the vinegar in the recipe until it was totally gone, letting the increased cocoa add the acidity along with the buttermilk, and I had that velvety texture back.
Voila! Red velvet cake. No beet juice. No red food coloring. Chocolate cake that was noticeably red…especially in a sunlit room. It's not gonna pass your Red-Velvet-Cake-obsessed-friend's color scrutiny. But it's quite obviously red. Here's a picture of a mini Red Velvet Cake using my recipe, next to an actual chocolate cake:
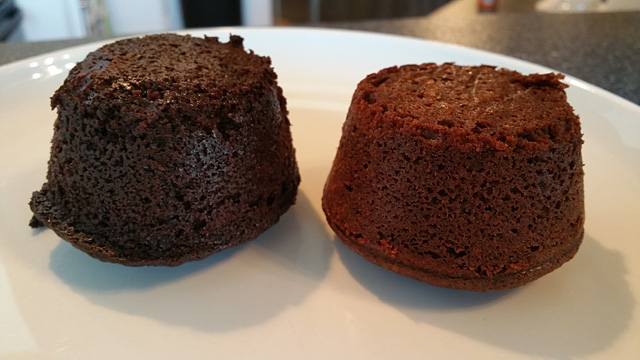
Red Velvet Cake with NO food coloring or beet juice, at right, next to a normal chocolate cake on the left. The red color might not be noticeable without this frame of reference. This is under incandescent lighting and has not been altered.
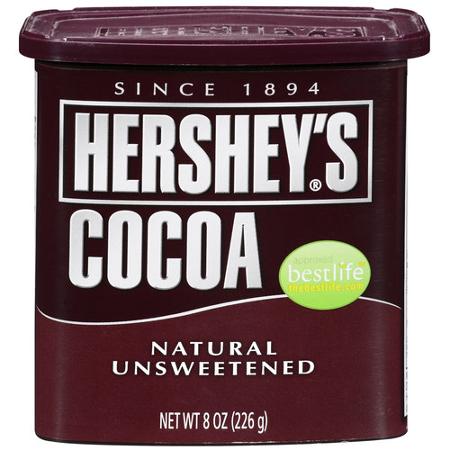
You'll notice the measurements in this recipe are by weight (ounces), not by volume. If you don't have a kitchen scale, that should be on your next grocery list. They're not expensive, and it will make your life SO much easier in the kitchen. No more measuring cups to wash! I still publish some recipes in volume style, when it's convenient. But 6 ounces of flour doesn't translate into an easy-to-measure volume. (One cup of unbleached flour SHOULD be 4 1/4 ounces, but if you and I each measure out one cup of flour and then weigh it, we will have two different amounts of flour, even though we both measured out 1 cup.) So just get a kitchen scale, it will make your baking easier AND better.
In the bowl of your stand mixer, combine:
6 ounces (1 and a half sticks, or 12 Tablespoons) unsalted butter, at room temp
15 3/4 ounces light brown sugar
Cream these together at medium high speed for about 5 minutes…longer than you think is necessary…until the mixture is light and fluffy. Then add, one at a time:
3 eggs
Beat each egg in fully before adding the next, maintaining that light fluffy texture.
In a large bowl, combine:
6 ounces unbleached flour
6 ounces cake flour
2 1/4 ounces natural cocoa powder
1 1/2 teaspoons baking soda
3/4 teaspoon Kosher salt
Sift this mixture twice with a strainer. This is an important step, don't skip it. MOST recipes that call for sifting actually don't need any sifting. That's an antiquated technique (like baking recipes that call for scalding milk) that was originally used to remove tiny bits of stone that remain in the flour after the grinding process. Modern flours aren't stone ground any longer, and are sifted multiple times in the factory before packaging. However, in this recipe, the sifting is important because both cake flour and cocoa powder tend to clump, and the dry ingredients need to be fully aerated to achieve that velvety texture that is every bit as important as the red color in Red Velvet Cake.
In a large measuring cup, combine:
1 1/2 cups buttermilk, warmed 30 secs in the microwave
2 teaspoons vanilla
Whisk this together with a fork. On low speed in the stand mixer, add 1/3 of the dry ingredients and 1/3 of the buttermilk to the butter/sugar/egg mixture. Let the mixer fully incorporate the ingredients before you add the next 1/3 of each. And then the final 1/3. Let the mixer run an additional 5 minutes (important) on low speed to ensure the batter is fully smooth.
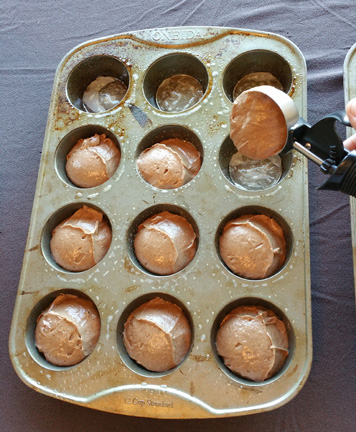
Preheat your oven to 325F (or 375F if baking cupcakes) and place the rack in the center of the oven.
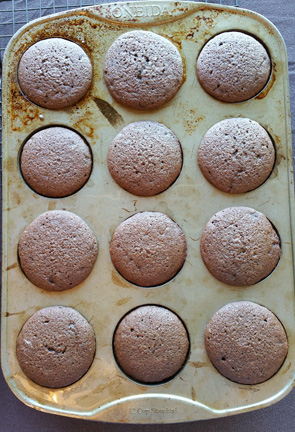
Bake full 9″ cakes for 30-35 minutes, individual cakes for 20-25 minutes, or cupcakes for 15-20 minutes (at 375F…cupcakes need a higher temperature to raise their tops into a high, rounded shape. Cakes you want flat across the top for easier frosting, which is why you bake them 50 degrees cooler.) You'll know the cakes are done when you gently touch the top and it's not sticky and doesn't give easily when you press. It should have a bit of resistance and even spring back just a bit when you remove your finger. You can also stick a knife or toothpick in the cake, and if it comes out clean, with no streaks of batter, it's done. But who wants to stab their cake?!?
Remove the pans and cool for 15 minutes in the pan. Then you can remove the cakes, which should slide out easily because of that parchment layer you worked so hard on.
The traditional topping for Red Velvet Cake these days is cream cheese frosting. Which is a good thing, because it's the easiest of all the frostings to make, AND it tastes the best. If you are frosting a layer cake, let them fully cool and put them in the freezer for 30 minutes to firm up while you make the frosting. This will prevent all those little crumbs from accumulating in the frosting.
In the bowl of your stand mixer, combine:
8 ounces cream cheese, at room temp
4 ounces (1 stick) unsalted butter, at room temp
Beat these together on medium high speed until they are light and fluffy. Reduce the speed to low and add, a bit at a time:
1 pound powdered sugar
After the sugar is mostly incorporated, you can raise the speed to beat it until the frosting is light and airy. Then add:
1 Tablespoon vanilla
Beat until it's fully incorporated. And please note, if your household is cream cheese frosting obsessed, you might wanna double this recipe!!
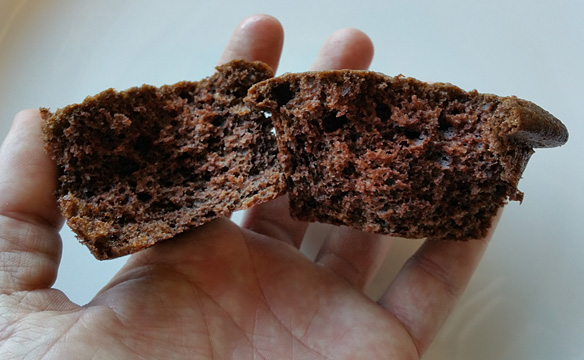
Is it red? Yes. Is it crazy-neon-sign-crime-scene red? No. Why would you want it to be? This color comes from natural reactions between natural ingredients. No color editing on this photo.
The red color in the cake will definitely pop once you've got layers of white frosting between it. Plop your cake in front of your family and friends and brag about how you made Red Velvet Cake with no red food coloring OR beet juice.
How cool are you?
Thanks for reading! Feel free to comment below, and subscribe to my blog in the upper right corner of this page so you don't miss any crazy new recipes, innovations, and ramblings.
How to Color a Cake Without Food Coloring
Source: http://benstarr.com/blog/real-red-velvet-cake-with-no-food-coloring-or-beet-juice/
0 Response to "How to Color a Cake Without Food Coloring"
Post a Comment